This is my first tutorial and second time water marbling. So I hope that somebody finds it useful. I tried a different technique this time and it worked much better then the first time.
These are the polishes that I used (Left to Right):
OPI Quarter of A Cent-Cherry, OPI Smitten With Mittens, OPI Stars In My Eyes, Orly Luxe

I started with a base coat of color on my nails. I would really recommend that you use a base color. As sometime as the marble will not cover your whole nail. I choose OPI Stars In My Eyes and did a total of three coats because it is a sheer.

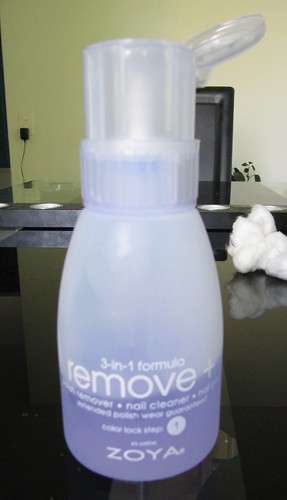
There are some supplies you will need. It's handy when you have your nail polish remover in a pump or bottle cap. Marbling is very messy and picking up the bottle of remover and getting it on a cotton swab may be difficult. Also to help make cleanup easier I would recommend taping and olive oil.

The tape is the most useful item to make cleanup easy. Tape the skin that is around your nail. Then take the olive oil and carefully put it on any parts of the skin that you were not able to tape. If you don't want to use the tape you can put olive oil all over your skin but not your nail. I wouldn't advise you to only use olive oil as it is way harder to clean up. Below you can see my fingers all taped up.

Tip: Only tape one hand at a time. If you tape up both it will make it hard for you, grab the handles of the polish. The taped hand can be very clumsy.
Once your fingers are taped you can begin the water marbling process! For this you will need either a plastic cup or plastic sandwich container. I used a plastic cup, but I would recommend a plastic container because it will have more open space, making it easier to dip your finger into the water. You will also need an a few orange sticks to swirl the polish together. They get gunky so you will want more than one.
First step is to fill your cup with water. I found that using hot water does not work. I used water that was room temperature. When you're swirling the polish you will notice if it's working or not. If it's sticking and not moving easily, then you need to change the water temperature.
The next step is dropping the drops of polish into the water. You can tap the cap on the rim to help have the polish drip easier. In the picture below you can see that it's a small red dot. It will start to spread out and get lighter. After the first drop you need to quickly start dropping in the other colors you are using.You need to do this very fast or you may have to restart the process. Have all your bottles open to help speed things up.

When you're dropping in polish it might not always work. You need to use pigmented colors and if you are trying this for the first time I would recommend using cremes. Glitter/sparkles are a bit tricky. When a drop hits the water and spreads out that is good. If you keep dropping drops and they are sinking to the bottom, then you will need to choose a different color.

Above is what it looks like after you drop in all your colors. If you're interested I used one drop Quarter of A Cent-Cherry, Smitten With Mittens, Stars in My Eyes, Luxe, and then another drop of Smitten with Mittens.
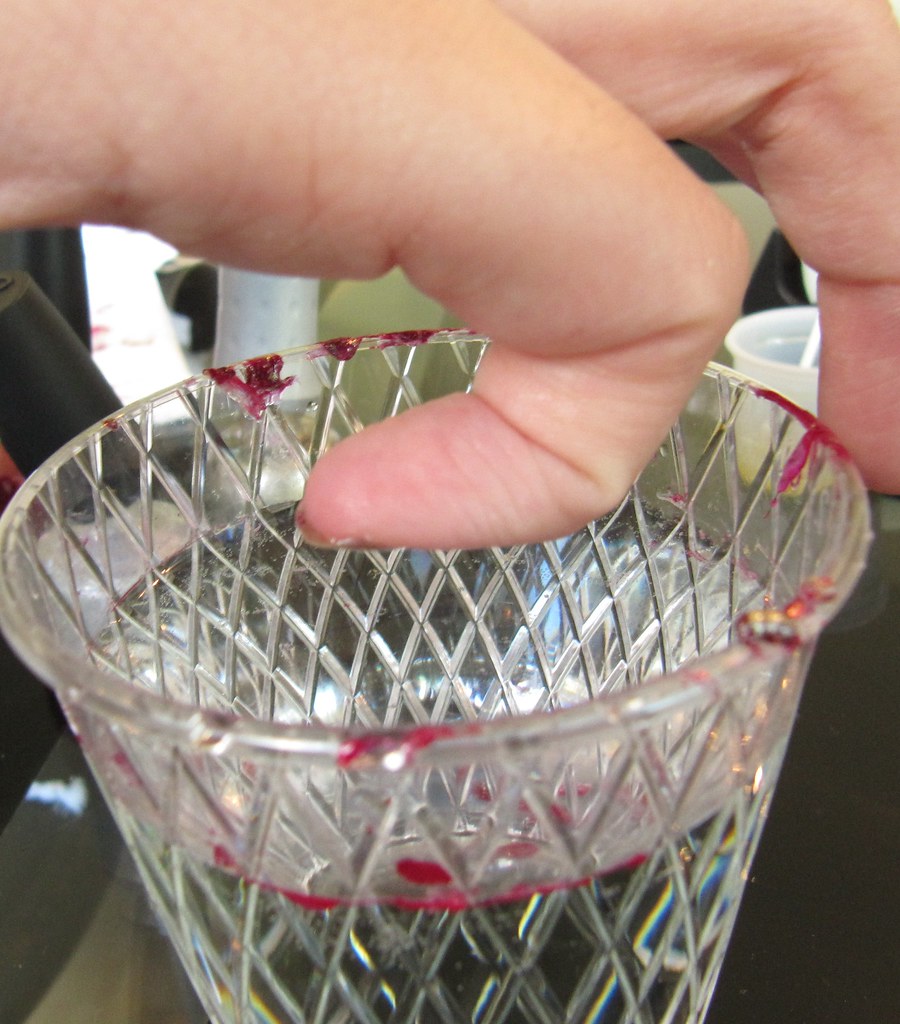
The next step is to gently swirl the polish with an orange stick. I used a nail (the kind that go on walls) because that is all I had in the apartment to use. I've found one way to help with make swirling easier is to leave the outside ring alone. The outside ring will act as a support band around your design in the middle. You can see in the middle that I took the nail and mixed or swirled the red, gold, and silver glitter but I left the outside untouched.
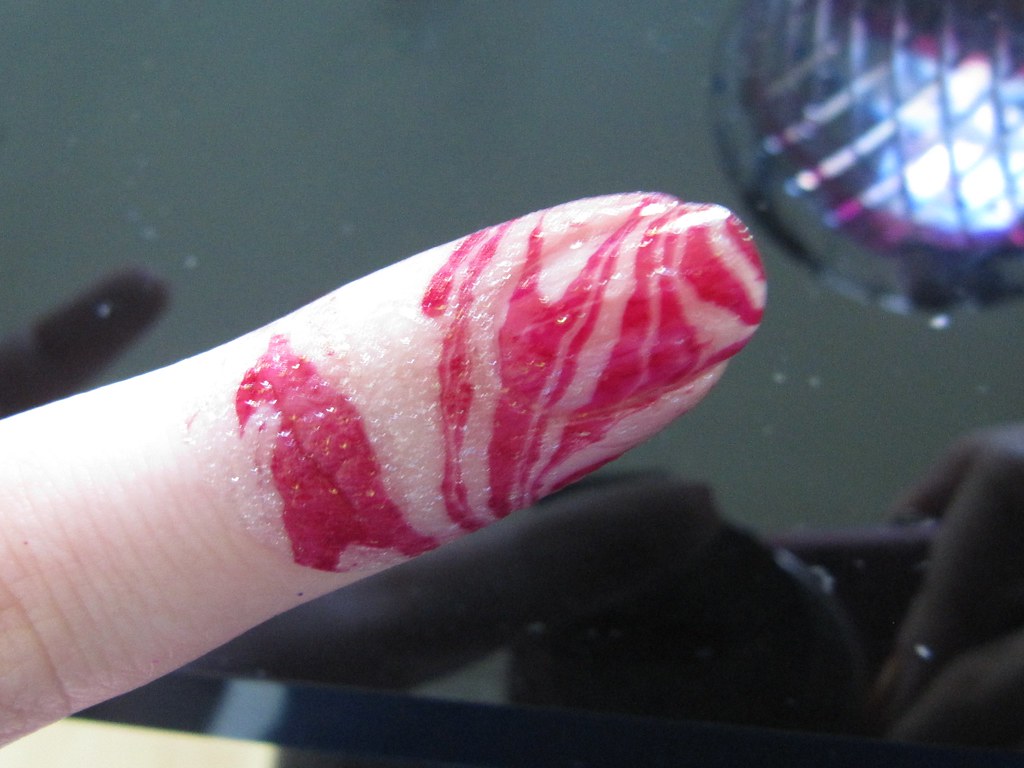
 The next step is to quickly dip your finger into the design. In the picture below you can see how I positioned my finger. Gently in that position dip your finger into the design. Your finger will be partially in the water. Then, while your finger is partially in the water quickly taking an orange stick and pull away the polish around your finger. After you pull the excess away you can carefully lift your finger up.
Tip: Dipping your finger can take practice. Before trying to do a full water marble manicure, take the time to do a few practice tries. It will make your first water marble manicure much easier.
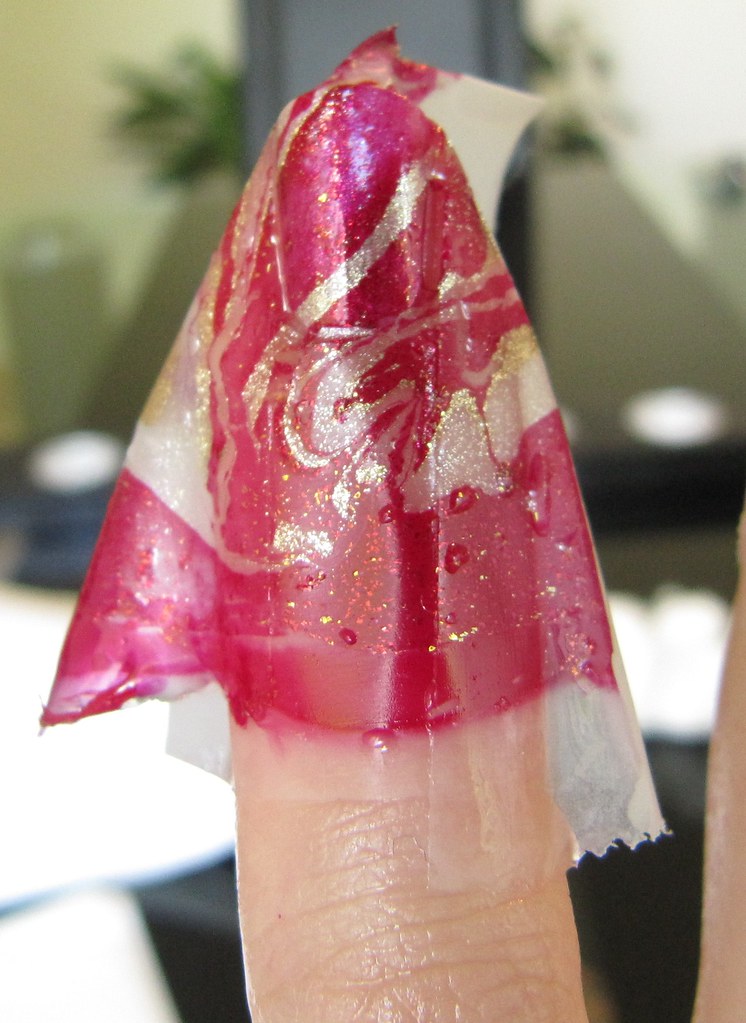
When you lift your finger up it will either look like the one on the left picture or right picture. Depending if you used just olive oil or if you taped up your fingers instead.
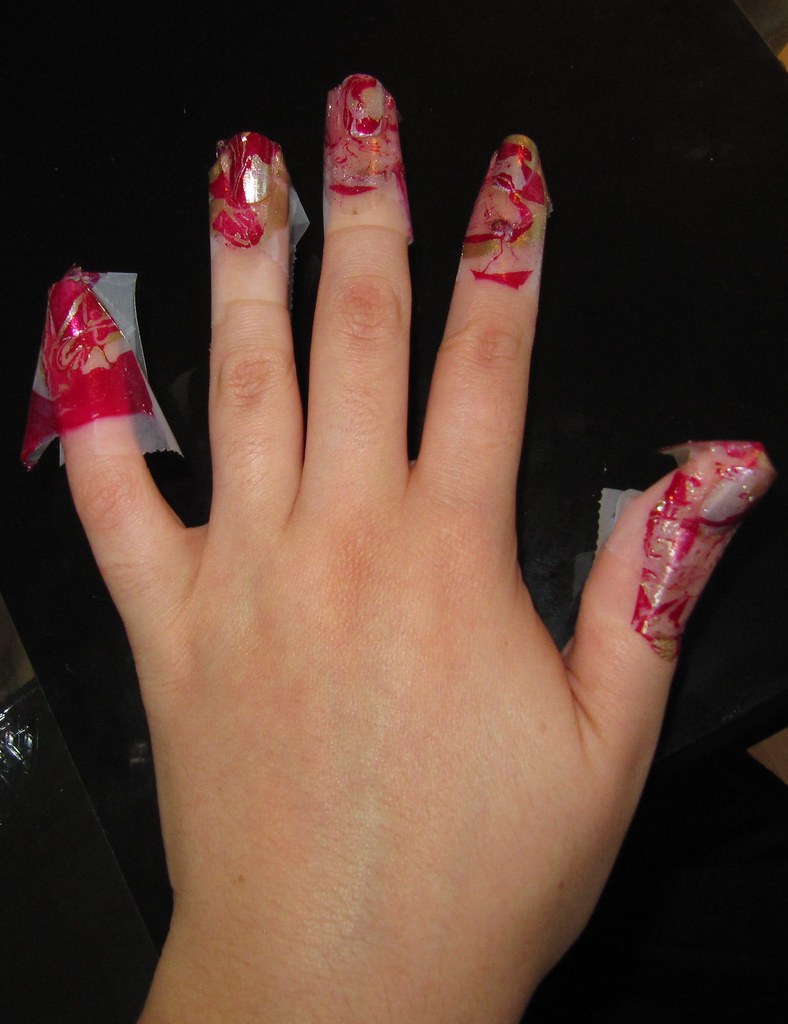
The next step is cleanup. If you used tape, then you can do all five taped fingers before needing to stop for cleanup. If you used olive oil only then each time you dip a nail, it will immediately need to be cleaned. With the tape I would wait a few minutes before you start carefully pulling it off that way you won't damage your designs. Below is a photo of my nails right after I pulled the tape off. You can see that there really isn't too much polish to cleanup just a little bit around my cuticles.
After you are finished with your first hand, I would wait at least ten minutes before apply a top coat otherwise it might smear the design. I used Orly Sec N Dry. After your top coat has dried you can move on to your next hand.
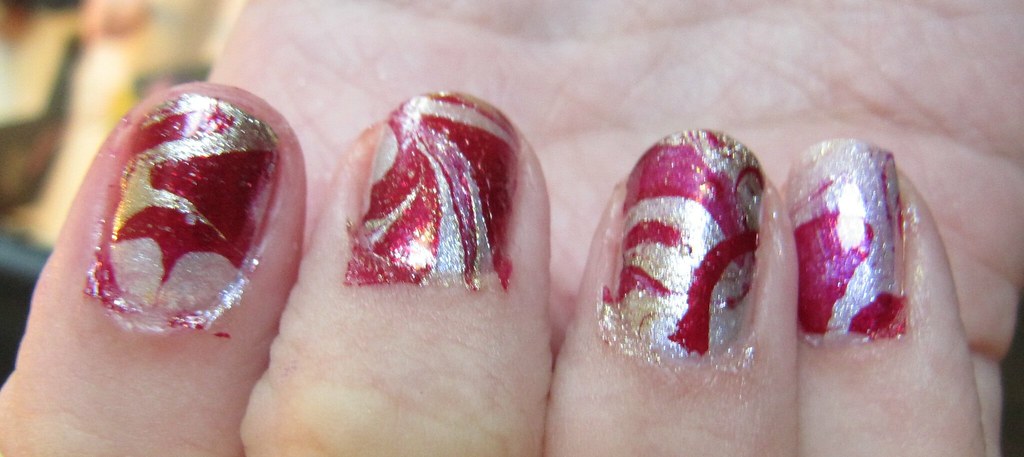
Here are my results!
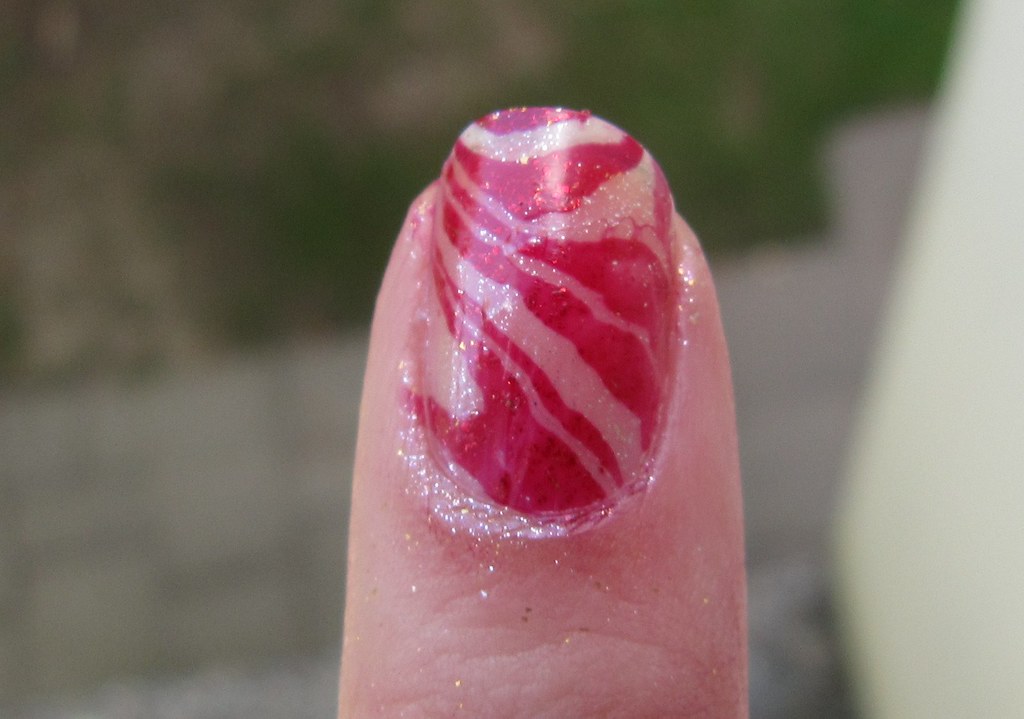
The above was my test try to make sure the colors I picked work. Below is my finished manicure.


It's still messy around my cuticles, but I was trying to make sure I got pictures before the sun went away. Regardless, I hope you found this tutorial useful.
These are the polishes that I used (Left to Right):
OPI Quarter of A Cent-Cherry, OPI Smitten With Mittens, OPI Stars In My Eyes, Orly Luxe
I started with a base coat of color on my nails. I would really recommend that you use a base color. As sometime as the marble will not cover your whole nail. I choose OPI Stars In My Eyes and did a total of three coats because it is a sheer.
There are some supplies you will need. It's handy when you have your nail polish remover in a pump or bottle cap. Marbling is very messy and picking up the bottle of remover and getting it on a cotton swab may be difficult. Also to help make cleanup easier I would recommend taping and olive oil.
The tape is the most useful item to make cleanup easy. Tape the skin that is around your nail. Then take the olive oil and carefully put it on any parts of the skin that you were not able to tape. If you don't want to use the tape you can put olive oil all over your skin but not your nail. I wouldn't advise you to only use olive oil as it is way harder to clean up. Below you can see my fingers all taped up.
Tip: Only tape one hand at a time. If you tape up both it will make it hard for you, grab the handles of the polish. The taped hand can be very clumsy.
Once your fingers are taped you can begin the water marbling process! For this you will need either a plastic cup or plastic sandwich container. I used a plastic cup, but I would recommend a plastic container because it will have more open space, making it easier to dip your finger into the water. You will also need an a few orange sticks to swirl the polish together. They get gunky so you will want more than one.
First step is to fill your cup with water. I found that using hot water does not work. I used water that was room temperature. When you're swirling the polish you will notice if it's working or not. If it's sticking and not moving easily, then you need to change the water temperature.
The next step is dropping the drops of polish into the water. You can tap the cap on the rim to help have the polish drip easier. In the picture below you can see that it's a small red dot. It will start to spread out and get lighter. After the first drop you need to quickly start dropping in the other colors you are using.You need to do this very fast or you may have to restart the process. Have all your bottles open to help speed things up.
When you're dropping in polish it might not always work. You need to use pigmented colors and if you are trying this for the first time I would recommend using cremes. Glitter/sparkles are a bit tricky. When a drop hits the water and spreads out that is good. If you keep dropping drops and they are sinking to the bottom, then you will need to choose a different color.
Above is what it looks like after you drop in all your colors. If you're interested I used one drop Quarter of A Cent-Cherry, Smitten With Mittens, Stars in My Eyes, Luxe, and then another drop of Smitten with Mittens.
The next step is to gently swirl the polish with an orange stick. I used a nail (the kind that go on walls) because that is all I had in the apartment to use. I've found one way to help with make swirling easier is to leave the outside ring alone. The outside ring will act as a support band around your design in the middle. You can see in the middle that I took the nail and mixed or swirled the red, gold, and silver glitter but I left the outside untouched.
Tip: Dipping your finger can take practice. Before trying to do a full water marble manicure, take the time to do a few practice tries. It will make your first water marble manicure much easier.
When you lift your finger up it will either look like the one on the left picture or right picture. Depending if you used just olive oil or if you taped up your fingers instead.
The next step is cleanup. If you used tape, then you can do all five taped fingers before needing to stop for cleanup. If you used olive oil only then each time you dip a nail, it will immediately need to be cleaned. With the tape I would wait a few minutes before you start carefully pulling it off that way you won't damage your designs. Below is a photo of my nails right after I pulled the tape off. You can see that there really isn't too much polish to cleanup just a little bit around my cuticles.
After you are finished with your first hand, I would wait at least ten minutes before apply a top coat otherwise it might smear the design. I used Orly Sec N Dry. After your top coat has dried you can move on to your next hand.
Here are my results!
The above was my test try to make sure the colors I picked work. Below is my finished manicure.
It's still messy around my cuticles, but I was trying to make sure I got pictures before the sun went away. Regardless, I hope you found this tutorial useful.
It looks amazing! I've never tried it but it doesn't look too difficult :) Thank you so much for making this tutorial, I might even try it myself now :)
ReplyDeleteThanks! I'm glad that you might try it now! The most difficult thing is getting the swirl right. If you practice that a few time you will be fine! Clean-up is really hard too but the tape method makes it so much easier.
ReplyDeleteWow, this is amazing! I can't wait to try it!
ReplyDeleteThanks Ashley! I hope it works out for you!
ReplyDeleteThanks for this tutorial, ive been dying to try it out but havent been able to find a good enough tutorial to help me through it . Yours was awesome :) Gonna bookmark your blog and keep checking in, i like it!
ReplyDeleteThanks Honi! I hope it works well for you!
ReplyDeleteJust tried actually, it worked awesome :) Posted a few pics on my blog if you want to check it out!
ReplyDeleteI cant believe I haven't read your blog before now - glad I found it. I have never tried marbling before but I am keen to do it.
ReplyDeleteThankyou for the straightforward tutorial. The photos really help too!
Thanks Helen! I tried to take as many photos as possible. The technique takes some practice but once you have it down it's really easy.
ReplyDeleteOMG i just tryed this and for my first go i thought i did good. Thanx for your detail tutorial am a new follower
ReplyDeletemiss giggles
x
Thanks miss giggles! I'm glad it worked for you! Thanks for the follow. :)
ReplyDelete